Ciao,
Ho ordinato il modulo N1 OSD che si interfaccia con la naza V2 e vorrei sapere se devo solamente rifare la calibrazione del gps o se devo eseguire anche qualche altra procedura affinché tutto funzioni correttamente.
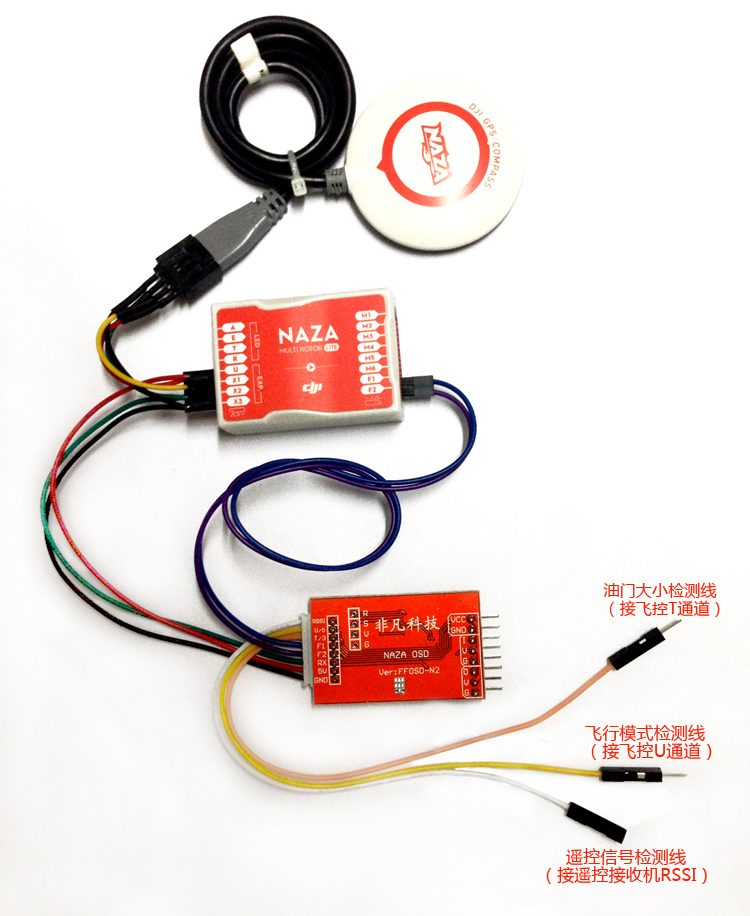
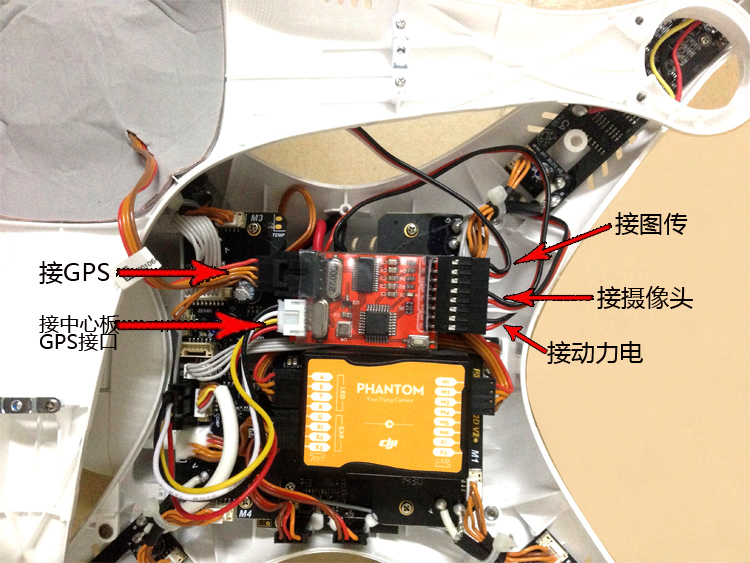
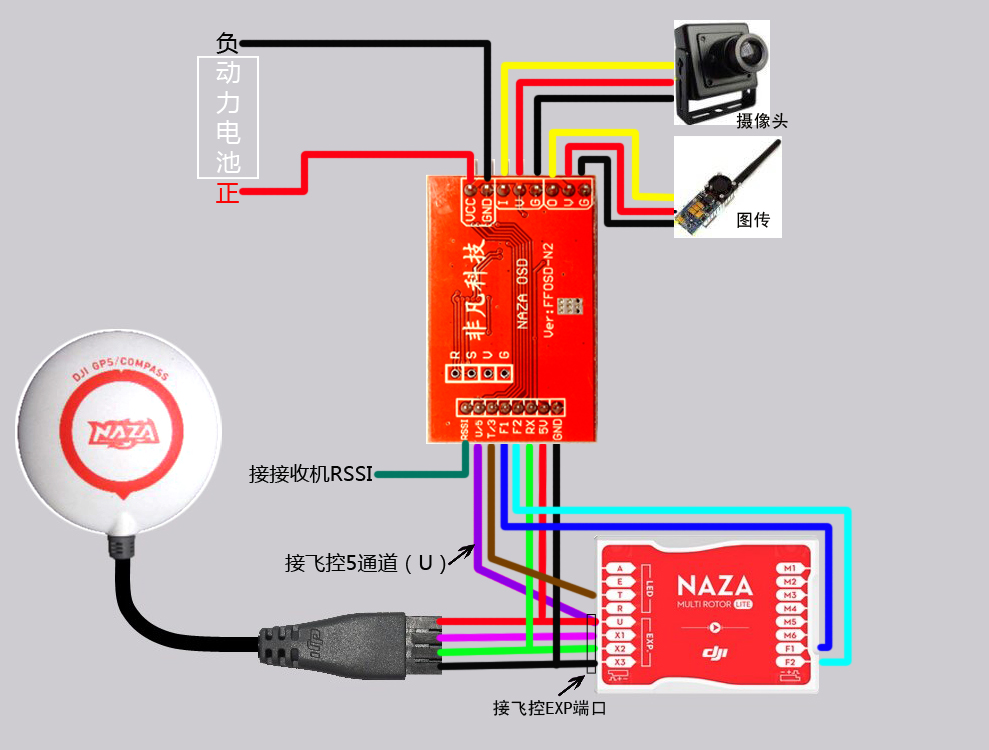
Grazie, allego la foto del modulo OSD
Ho ordinato il modulo N1 OSD che si interfaccia con la naza V2 e vorrei sapere se devo solamente rifare la calibrazione del gps o se devo eseguire anche qualche altra procedura affinché tutto funzioni correttamente.
Grazie, allego la foto del modulo OSD
File allegati

 per fortuna il link dove l'ho ordinata ha una foto dei collegamenti che sono semplici e veloci.
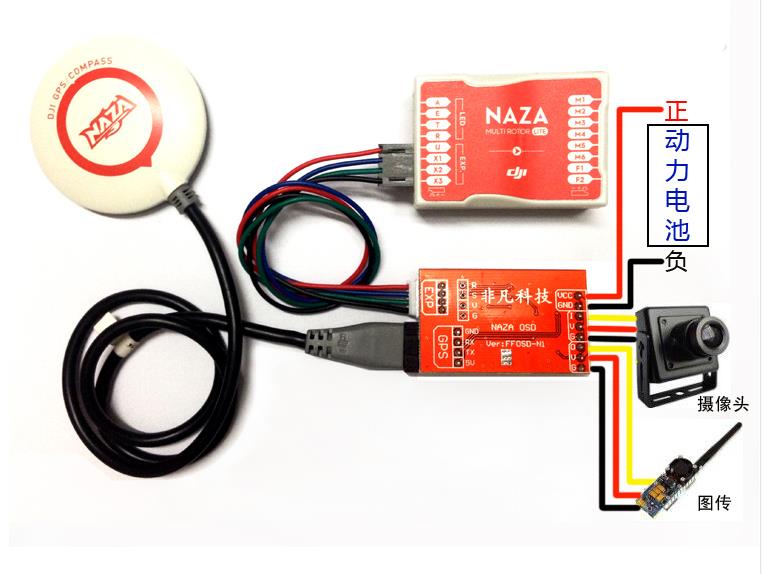
")

Commenta